
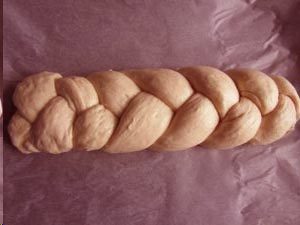
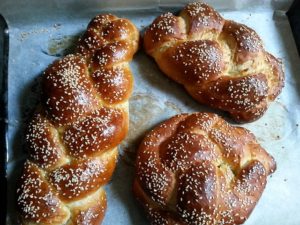
Gluten-Free Braided Sweet Hamotzi Challah Recipe
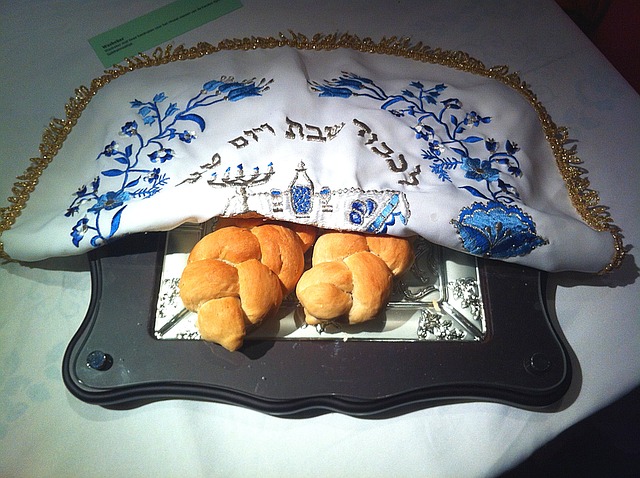
A Dairy-Free, Gluten-Free, Braided Quick Sweet
Hamotzi Challah Bread Recipe.
Gluten-free dough gets only 1-rise.
(no rise and punch down time and second rise
…Like wheat flour requires)Made from healthy organic oat flour. It saves you
an hour or two over wheat-based rich braided challah
recipes.
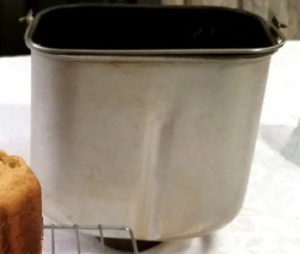
Mix it in the bread machine, or in a stand mixer with
dough hook, or by hand.You may make this as a tasty bread for any day, but
(Hamotzi Challah for use on Shabbat, ‘requires that it is made
from one of 5 Biblical grains.’ And contains water and yeast.
Oat flour is the only one of the grain choices that is gluten-free).Nevertheless, this is dough. This versatile dough recipe can
also be used to make dinner rolls, pull-apart cinnamon rolls,
even fried donuts, It does not need to be braided. It can
be rolled flat into a rectangle, spread with filling, rolled up jelly
roll style, then sliced into buns, like cinnamon buns.
For Doughnuts When ready to bake, instead of oven baking,
drop in an inch of 375º F preheated avocado oil and fry for donuts, garlic knots, or zeppola’s. When cool, shake in a bag of sauteed minced garlic OR powdered sugar.You can bake this like a Babka, twisted strands layered
with cinnamon-sugar, a mix of date paste and honey,
or cocoa and honey, or fruit-spread, and baked in a loaf
pan. I haven’t tested it that far yet.
Mix Ingredients
(Put in bread pan in this order).
¼ cup warm water (approx. 85º to 100º)
1 tbs. honey (stir to dissolve in the water)
2¼ tsp active dry yeast (sprinkled on water).
Let yeast become activated, puffy.
Add
1/3 cup olive or coconut oil
1 large egg plus 2 egg yolks (all lightly beaten)
¼ cup honey, or maple syrup
(optional: 2 teaspoons vanilla, or almond extract)Buttermilk
¼ tsp vinegar +
¼ cup non-dairy milk,
Blend These Dry Ingredients:
1 tsp. baking powder
1/16 tsp. baking soda to dry ingredients
1 tsp. salt
¼ cup coconut sugar
USE THIS all-purpose GF Flour Blend:
1-3/4 cups organic gluten free oat flour
1/2 cup Tapioca starch/flour
3/4 tsp. Xanthan gum
Directions
1 – Place the 85º to 110º water and yeast, + vinegar
(buttermilk), plus oil, eggs, and honey, in either a
bread machine pan or stand mixer bowl (pre-warmed
with hot tap water)
2 – Add Mixed sugar, baking powder, baking soda,
salt, and flour. (Or By hand, Make a well in the flour,
and beat in the liquids).
3 – Process the ingredients on the dough cycle 6 to 8
minutes until tacky, and pulls from pan cleanly. If using
add-ins, Add raisins, dried fruit, or chocolate chips,
process 2-3 minutes longer.
*(Normally you would let wheat dough rise to double
in size, punch it down, knead it, make your shapes,
and let it rise again.)
Gluten-Free yeast dough should be shaped an placed
on a parchment lined baking sheet or loaf pan. It
should NOT rise until double in size. Doing so will dry it
out when it bakes. It may even collapse instead of rise in the
oven.Gluten-Free yeast dough only gets one rise.
It does not get handled. It goes right into the preheated oven.
It saves you a lot of time.Gluten free yeast dough needs to be annoyingly wet
and difficult to handle for a successful end result. Once
you have a thick wet dough, set it down on lightly floured
parchment. Use only enough flour on your hands to shape
it or roll into strands. Brush the shapes with oil or water and
let them rest, covered with a sheet of parchment, in a warm
place, until it looks somewhat risen, or puffy, not doubled!
The easiest way to make the dough is in the bread machine
on the dough cycle, or if you have no machine, a stand
mixer with dough hook attachment run for 8 minutes.
(You can beat ingredients by hand for 5 minutes until smooth
but still tacky). Add teaspoons of water as needed for
moistness.
Once braided, this dough only partially rises 20 to 30
minutes, then rises the rest of the way in the oven while
it’s baking, and bakes for only 20 to 30 minutes.
- This recipe makes enough dough for 1 standard
size loaf (or 2 medium) braided loaves, (or 1 loaf and 4 to 6 rolls).Place all (room temp. Ingredients) in bread maker
in this order
Oats are inherently gluten-free, but if you are celiac, you
should used certified gluten free oats.For Shabbat Challah, oat flour is the only choice for one
of the required ‘5 Biblical grains’ that is gluten-free.
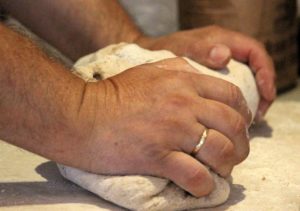
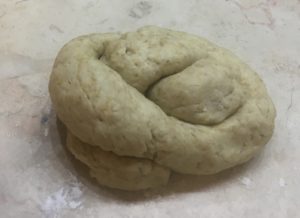
- This is how your dough should look:
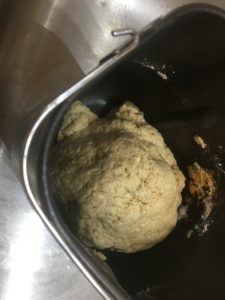
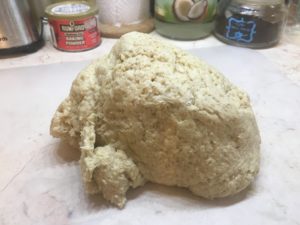
- Held together but quite annoyingly tacky.
You need to wet your fingers to handle it. Roll your
strands on a light dusting of flour. The secret to success
is keep the dough wet as possible. Avoid excess flour.
Flour your fingers if the dough sticks too unmanageably. - 4 – Divide the dough mass in half first, if you want to make
to make 2 smaller challahs.
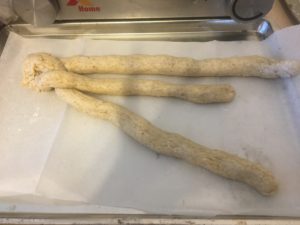
5 – Now Divide your dough into three sections.
6 – Roll each dough section into a long fat strand.
Fatter strands will retain more moisture which
is important for rising.
(Skinny strands may produce a dried out result)
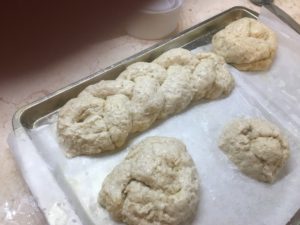
- 7 – Trim off and save some excess(from strands that are
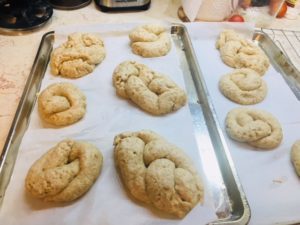
too long). Use them to form into rolls. - 8 – Place strands on a parchment-lined or lightly greased
baking sheet. Form braids by pinching
ends together, crisscrossing 3 or 4 strands. If ends don’t
stick, wet them. Brush the braids with lots of water
9 – You can additionally spray braided dough with a mist
of oil (olive or avocado). Oil keeps dough moist and allows
for expansion when rising. Do not coat with egg until
ready for the oven.
- Repeat with the remaining dough,
if making the second challah.
OR Form any remaining excess dough into rolls
or donuts, or flatten into a rectangle, spread with
filling, rollup jelly roll style, and slice into buns.
Lay on parchment lined pan, and bake about 20
minutes at 350º until golden brown. 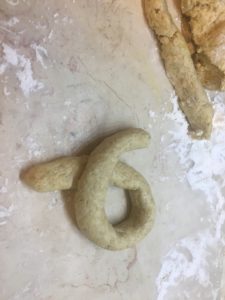
.
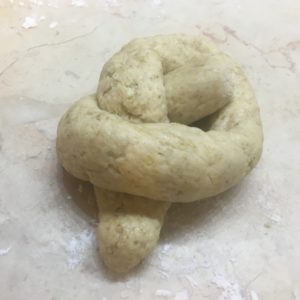
-
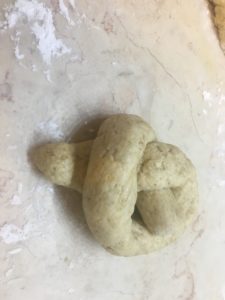
knot shape for gaelic knots or doughnuts. - 10 – Cover dough and place in 85ºF to 100ºF pre-warmed
oven leaving light on.
Set an ovenproof bowl of hot water on first rack
above the oven floor to add moisture, leaving the water
while baking. That is a common technique to impart
moisture when baking pitas.Let rise for 20 minutes or until looking puffy. Move it, covered,
to a warm place.Keep the rising dough covered with parchment in a warm place,
while you preheat the oven 10 to 15 minutes to 325ºF (150ºC)12.- Repeat with the remaining dough, or if making the second challah.OR Form any remaining excess dough into rolls
or donuts, or flatten into a rectangle, spread with filling,
roll up jelly roll style, and slice into buns. Lay on parchment
lined pan,
11. Put risen loaves aside in a warm place covered
while your oven pre-heats.
11 – Remove cover. Brush with a wash of egg beaten with
1 tbs. of water for shine. Sprinkle with seeds if desired.- (Brushing sooner may inhibit rising). Omit egg for vegan.
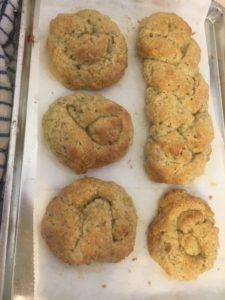
12. Bake about 20 minutes at 350º until golden brown.
- 13 – Test for doneness with a toothpick that comes
out clean, or an instant read thermometer.Allow to sit in oven with door open for about 20 minutes, to
avoid temperature shock. If you must remove it from the oven
to bake something else, cover with cotton kitchen towels.
NOTES:
** For Gluten Free Shabbat Challah (hamotzi bread blessing)
You need to use at least 50% of one of the biblical 5 grains, (that
means only oat flour (For celiac certified gluten free ).
You can make your own by grinding instant or whole oats in
a coffee grinder or food processor. 1/4 tsp per cup of dairy-free
buttermilk in any recipe provides a beautifully risen, light bread
and good color.
Water is a required hamotzi bread ingredient. Plant-based
milk is primarily water. When you add a tablespoon of vinegar
to a cup of plant-based milk, stir, and let it sit for 5 minutes,
it becomes vegan buttermilk. It contributes to rising of all
gluten-free baked goods. It is still primarily water.
- NOTES:
- Shape before rising. Because gluten free breads
have no rise and punch down time and second rise…(Like
wheat flour requires) you’ll want to shape any breads before
they rise (so they’ll only rise once!). After you shape, before
allowing to rise, brush or spray with water.Dinner rolls should
rise in the shape or tin you would like them to be; challah must
be braided first and then allowed to rise. For extra shine and
to make seeds stick,Directly before baking, brush with an egg
tsp. of water. - Don’t mess with gluten-free dough once it has risen,
just bake it!Make sure your rising spot is nice and warm.
A great method for making a warm space for your yeast breads
to rise before baking is to turn on your oven to 200º F, then turn it
off in after 10 seconds. Leave the oven light on.
Put your shaped dough into the warmed oven with a
cover over the top, and a bowl of very hot water in the oven
bottom, then let it rise 20 minutes.Once raised, remove it to
a warm place, still covered, while your oven preheats.Remove
the cover and bake according to directions.
When your bread is done cooking, turn off the oven heat
and leave the door open so that the bread can cool slowly.
Taking the bread out of a hot oven and quickly transferring
it to a cool counter can sometimes cause the loaf to sink in.
If you must remove the bread, cover it with a towel and place it
on a cooling rack.- Dinner Rolls:
Cut dough into 3rds and make 2 small challahs
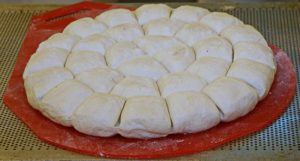
plus 6 knots for dinner rolls.Pull-apart rolls; or Cinnamon rolls:
should be formed before rising; should rise in their
pans by placing about 10 balls of 1″ of dough
side-by side in a greased (and papered in bottom)
9″ cake pan.
Optional: For deep color and shine, and to attach seeds if
using, brush with egg beaten just before baking. Sprinkle with the
sesame seeds, poppy seeds, or a combination or both..
 .To Make pareve rugelach from this dough,
roll the dough into 12″x15″ slabs 1/8″ thin,
Brush with coconut oil, sprinkle with cinnamon and
coconut sugar and raisins, and roll up from 15″ wide
end. Roll from left to right.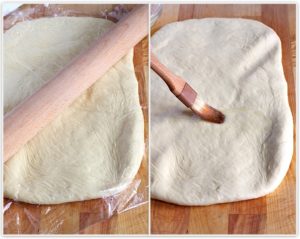
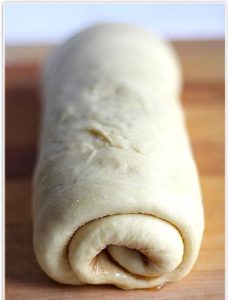
- Slice into 10 pieces 1.5″ wide each.
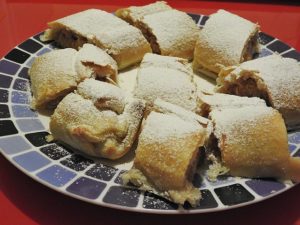
Let rise, covered in a warm place, 20 to 30 mins.
Coat with beaten egg and sugar and bake.
Or for cinnamon buns, lay the cut rounds on their side
touching, side-by side in a greased (and papered in bottom)
9″ cake pan. Drizzle with a glaze mix of 1/2 cup
powdered raw sugar.
3 tbs non-dairy milk.***
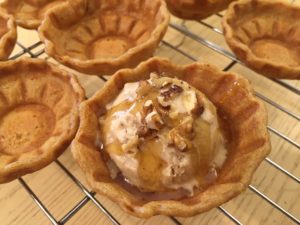
Dairy-Free Gluten-Free Donuts,
Roll to 1/2″ thick, cut with doughnut cutter.
For zeppola’s or garlic knots.
Make strands. Bend into a circle and twist end
over middle to make knots. Let shaped dough
rise about 40 minutes. Drop in 2.5″ deep vegetable
oil about or deeper 350º F. Turn over after 2 minutes.
When cool, shake in a bag with a cup of powdered
raw sugar or 2 tsp cinnamon mixed with a cup of sugar.
OR top dounuts with our healthy frosting.- ++++++++++++++++++++++++
Suggestion: A Great Challah Knife
by USA made Rada Knife from J. Mark
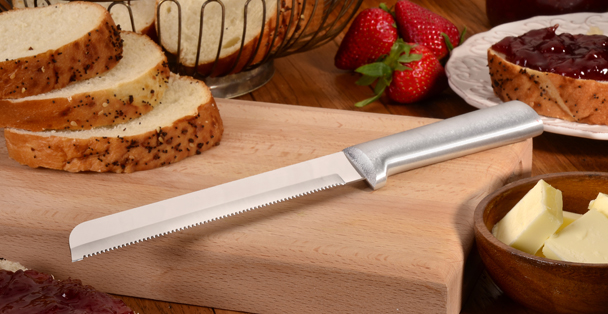
- R112 Serrated Bread Knife 14″ long – 9½” blade
And see all the other sizes while you’re there.


You must be logged in to post a comment.